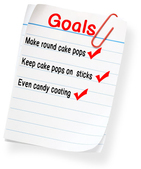
Today I faced my Mt. Summit of baking, the third and final goal of my cake pop network learning project, getting an even coat of candy on the cake pops. I was nervous, what if all I had learned up until this point just didn't come together? What if I choked when I was up at bat, er, stick? I was the most nervous to attempt this step because even if you have baked perfectly round cake pops and gotten them to stay on the sticks, a bad dip could ruin it all. As one Pinterest commenter said, "cake pops shouldn't be chunky." Check out the "Cake Pop Fails" below to see my worst nightmare regarding how this could all end. It is nice to know others have struggled with these as much as I did, as I found many "pins" titled, "How Not To Make Cake Pops."
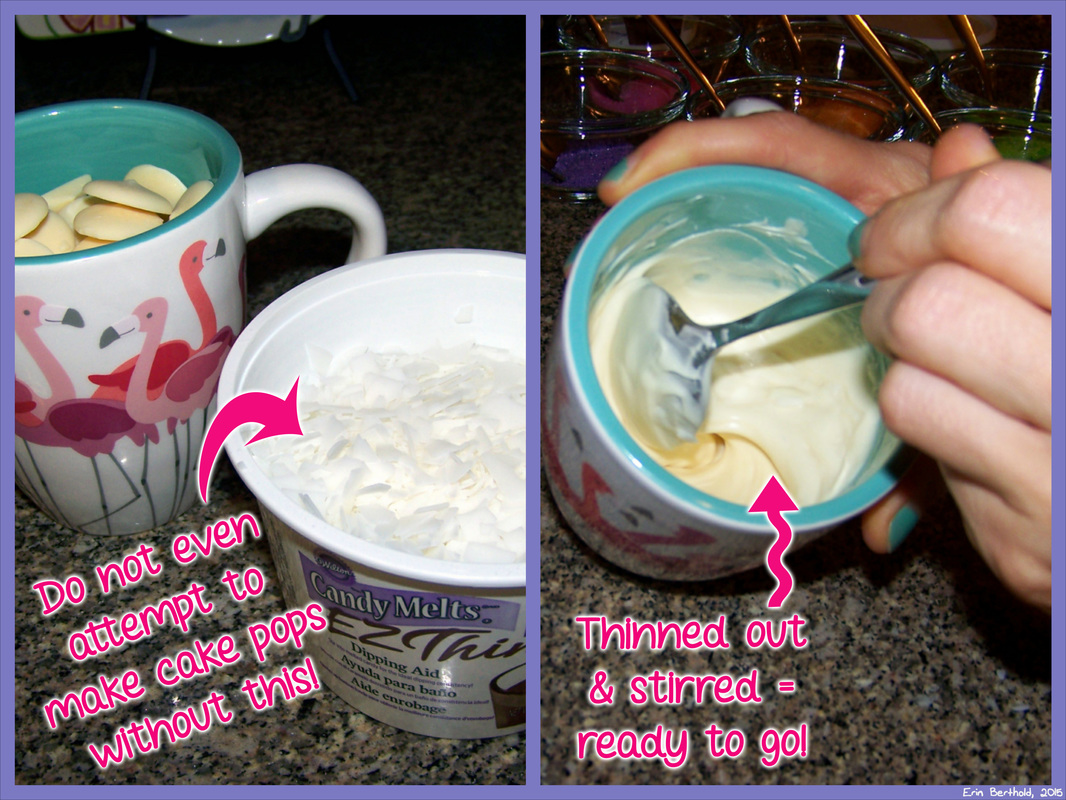
1. Meet My New BFF (Baking Friend Forever), Candy Melts EZ Thin
The Wilton course on Craftsy has become my video bible for cake pop making. Valerie Pradhan, the host, knows her stuff. She suggested using melted vegetable shortening to thin the candy melts before dipping. In the past I have used vegetable oil to do the same thing, but the results were less than desirable. So I set out to the grocery store to get myself a tub of Crisco, but ended up at the craft store first. Maybe it was divine intervention that lead me astray, because as I was (spending way more time than I should) in the baking aisle at the craft store, I saw the holy grail of cake pop making, Candy Melts EZ Thin. It was like a beacon shone down on it and I swear somewhere in the background there was a choir singing, "Ahhhhh." I figured this must be a new product or Wilton surely would have featured it in the video. Seeing how I had a 50% off coupon I decided to fork over the $2.24 and try it out. Best. Decision. Ever. Seriously, if you want to make cake pops (if you have been reading all of my blogs I am pretty sure you probably don't), you need this. After you melt your candy (follow the directions on the bag, they work) add in two tablespoons of EZ Thin. You can add more if you need to throughout the process.
2. Take the Plunge
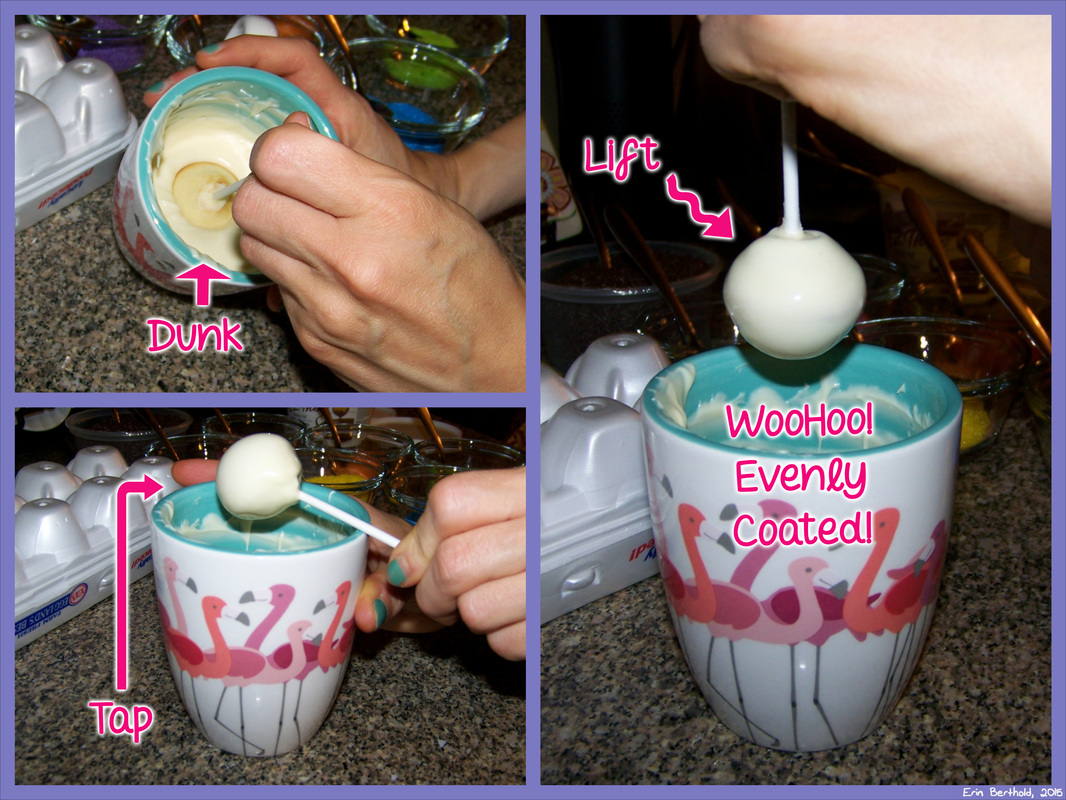
I had to work quickly as I didn't know how long the EZ Thin would be able to hold off the candy melts from hardening. Homemaker Chic gave sage advice for this step, "Get in and get out." The cake pop should be completely submerged in melted candy in a single straight up and down dip. Next, you must tap the stick on the side of the container to remove excess candy. This is a really important step. I found rotating the stick as I tapped helped to keep the candy layer even. A word of advice I probably should have mentioned earlier, choose your container carefully. You need depth here, not width. My favorite mug was just the right size for this. Also, be sure to use chilled cake pops straight from the fridge. Frozen cake pops will cause the candy to harden, yet warm cake pops may fall off the stick. Cake pops are the Goldilocks of dessert; everything needs to be just right.
3. To Decorate or Not to Decorate, That is the Question
I decided to get bold and try some of the decorating techniques involving sprinkles. Sprinkles must be added immediately after dipping so they will adhere to the melted candy. I happened to have a bunch of leftover colored sugar from the marshmallow flower cupcakes I made my mom for Mother's Day. Making your own colored sugar is a much cheaper way to go than buying colored sugar sprinkles. It is also really easy. Just put some regular sugar in a ziplock bag with a little food coloring (I used neon gel food coloring), close the bag really well, and squish it around to mix. That's it. Regardless of the kind of sprinkle you choose to use, coat the cake pop well, tap off any excess, and return to your cake pop stand of choice.

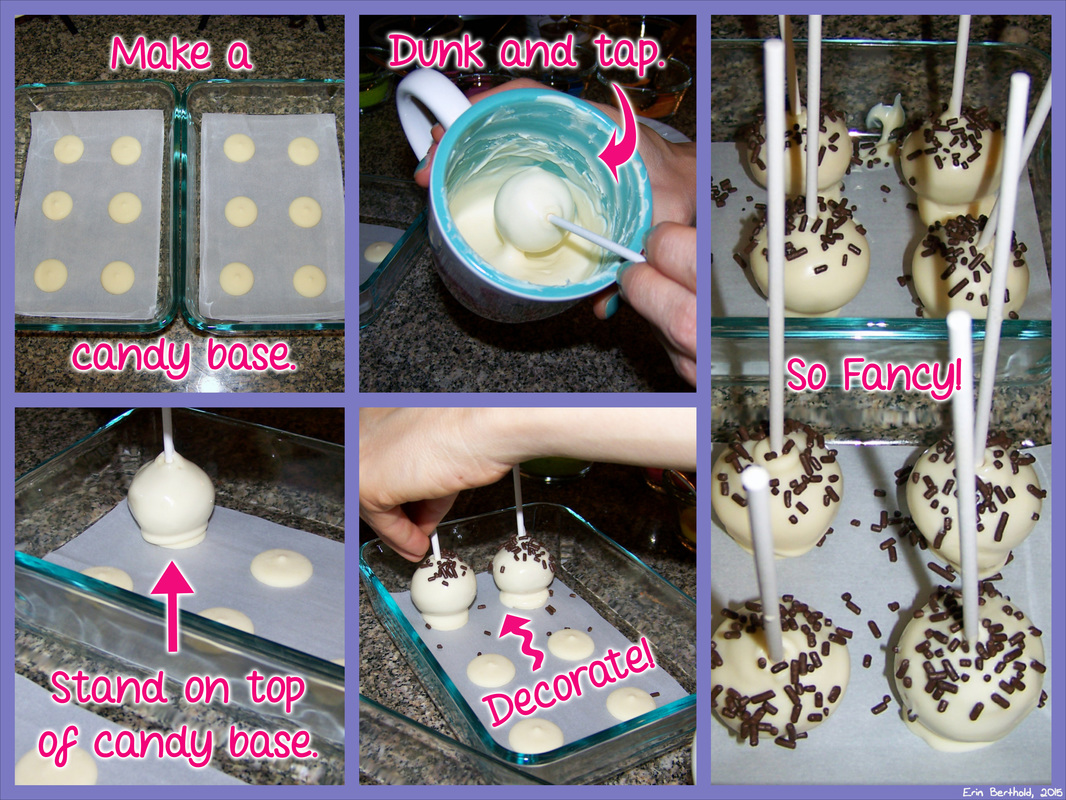
4. Candy Apple Style
I used my "less lumpy coneheads" for the traditional lollipop style shown above. I was saving my "lumpy coneheads" to test out what Karyn from Pint Sized Baker refers to as "Candy Apple Style" cake pops. For these, shape isn’t as important to the final outcome. To start, lay out some candy melts flat side down; these will be your base. Next, dunk your first cake pop. You don't have to worry about tapping off too much candy melt as it will flow down and pool around the base. Place your cake pop on top of the base and hold it there for a few seconds to allow the melted and non-melted candies time to mingle. If you want to add sprinkles (really, why wouldn't you?) you can do so now. I did my sprinkling two pops at a time to speed up the process a bit. I think I might like these better than the traditional style! This method is a bit more forgiving and will hide any previous faux pas. Plus, these will be much easier to serve and display as they don’t require a special holder to stand them up.
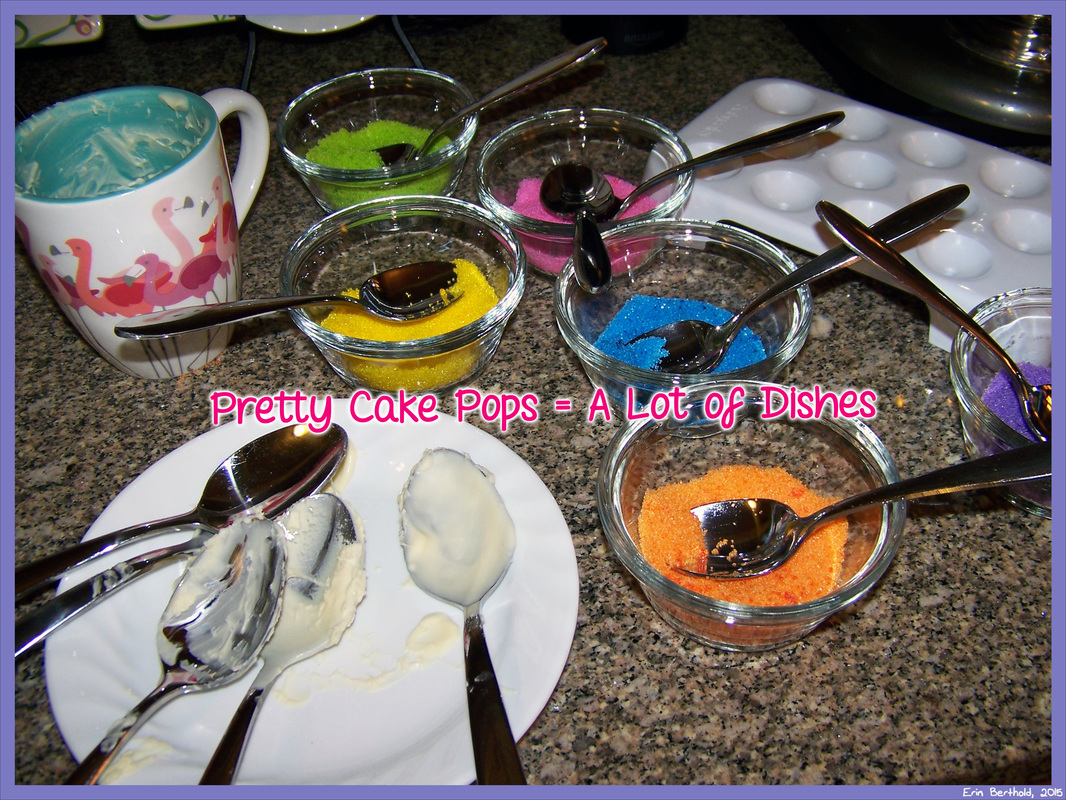
5. Clean Up Time, Clean Up Time, Everybody Do Your Share
Anybody else get this little ditty in your head when it is time to clean up? Must be a repercussion of my day job. As you can see, the more you decorate, the more dishes you will have to clean. It is amazing how such a tiny confection can cause such a big mess!
Networking Update
I got my first reply! I have left several messages on blogs which helped me throughout this project. Kim from The Partiologist is the first to reply. Therefore, I now like her on Facebook, follow her on Pinterest and Twitter, and have her in a circle on Google+. This week I left a message for Karyn at Pint Sized Baker. Let’s see if I can double my replies by next week!
I have been experiencing some Twitter action lately. Cake Recipes and Cake Art have "favorited" my tweets announcing cake pop blog posts.
Moving Forward
I have officially completed my three Network Learning Project goals. I even went a step further and added decorations! So, what’s next you ask? Maybe I will attempt some more advanced decorating styles, maybe I will show the entire process in one fell swoop, or maybe I will pack up my cake pop maker and never do this again. You will have to wait until next week to find out!

 RSS Feed
