In my last update I said, "My baking goals for the next NLP post are to find a strategy to keep the cake pops on the sticks between baking and decorating, find a way to store them upright after decorating, and begin to look into manageable decorating ideas." I changed my mind. Instead, I attempted my first assessment, making round cake pops. After thinking it over, it made sense to do this step first as the method of making the cake pops can alter how well they stay on the stick. I was also stressing about these cake pops all week! What if they don't work? What if the alternate methods don't work either? It was too much pressure. I had to just get started.
1. Getting It All Together
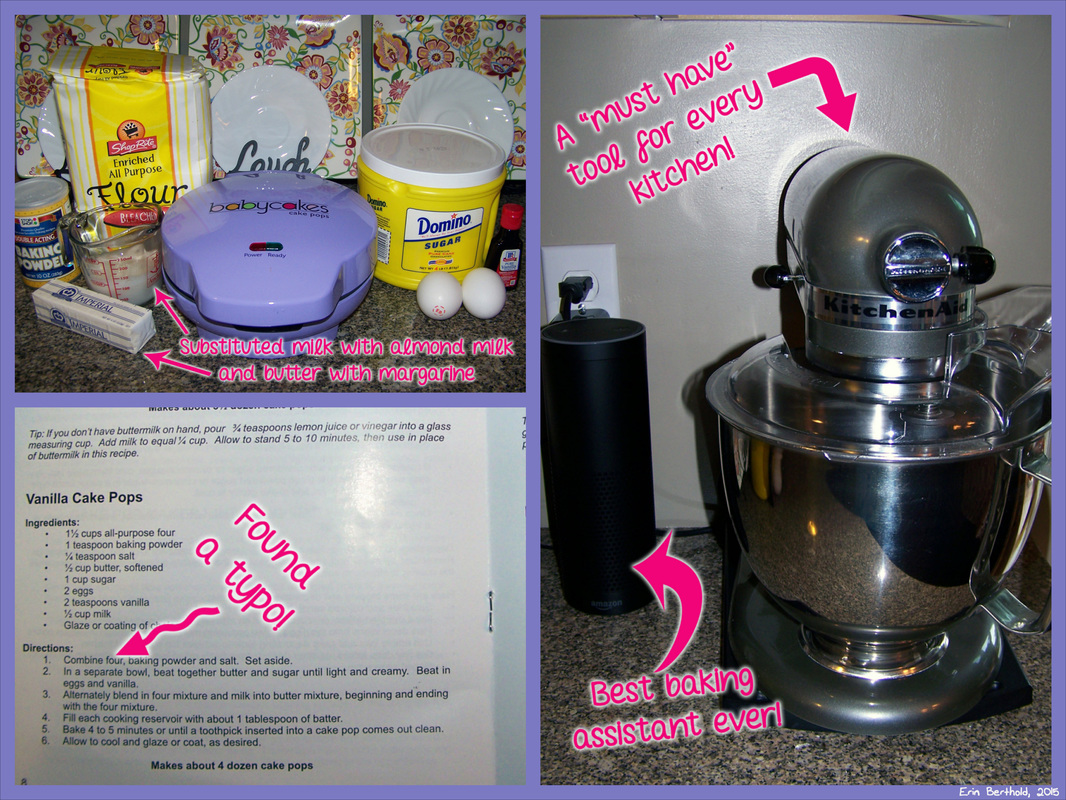
I first gathered all of the ingredients, the recipe, and the tools and appliances I would need to complete my task. This included my new favorite piece of technology, the Amazon Echo. The Echo, or Alexa as she likes to be called, is a really great assistant in the kitchen. While it probably wasn't designed for this role, it is how I use it the most (TPACK!). Being voice-activated means I don't have to constantly be washing my hands to set a timer, change the song I am listening to, or add items to my shopping list as I use them up. During this baking adventure, Alexa kept me smiling with some up-beat tunes and corny jokes. I needed to hear one before I even got started to break my cake pop tension!
"How do you make an octopus laugh? You give it ten-tickles."
2. Mixing It Up
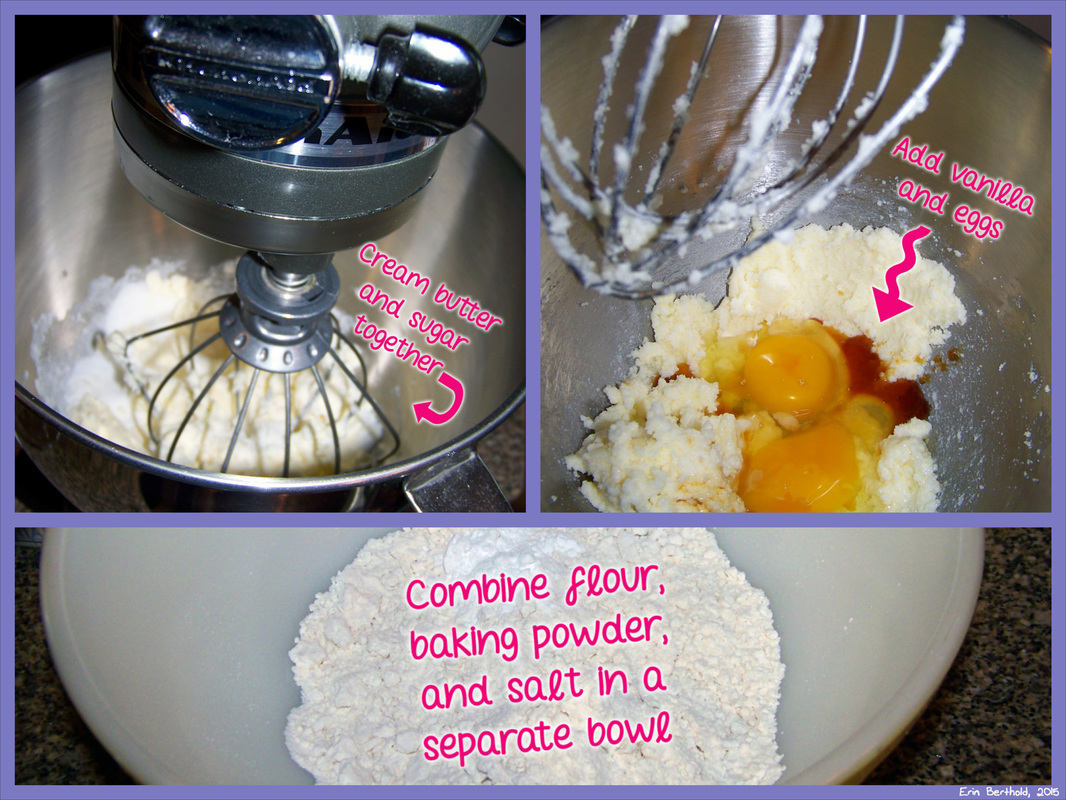
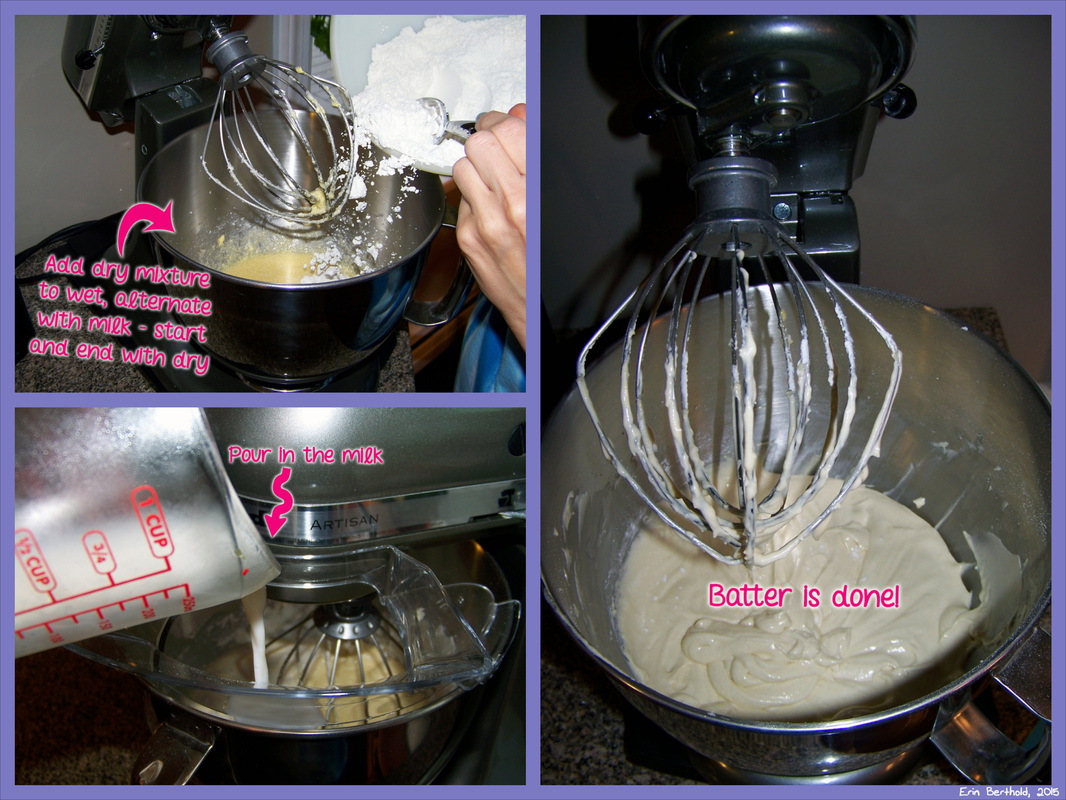
Given my last cake pop fiasco, I followed the steps in the recipe from the Babycakes manual to the letter. This recipe called for creaming the sugar and butter together. I think this is a key difference between using a cake mix, which calls for oil, and making the batter from scratch. Cake pops made from a mix are too oily when it comes to covering the pops in the candy coating.
3. "Put it in the Bag, Put it in the Bag, Bump Bump"
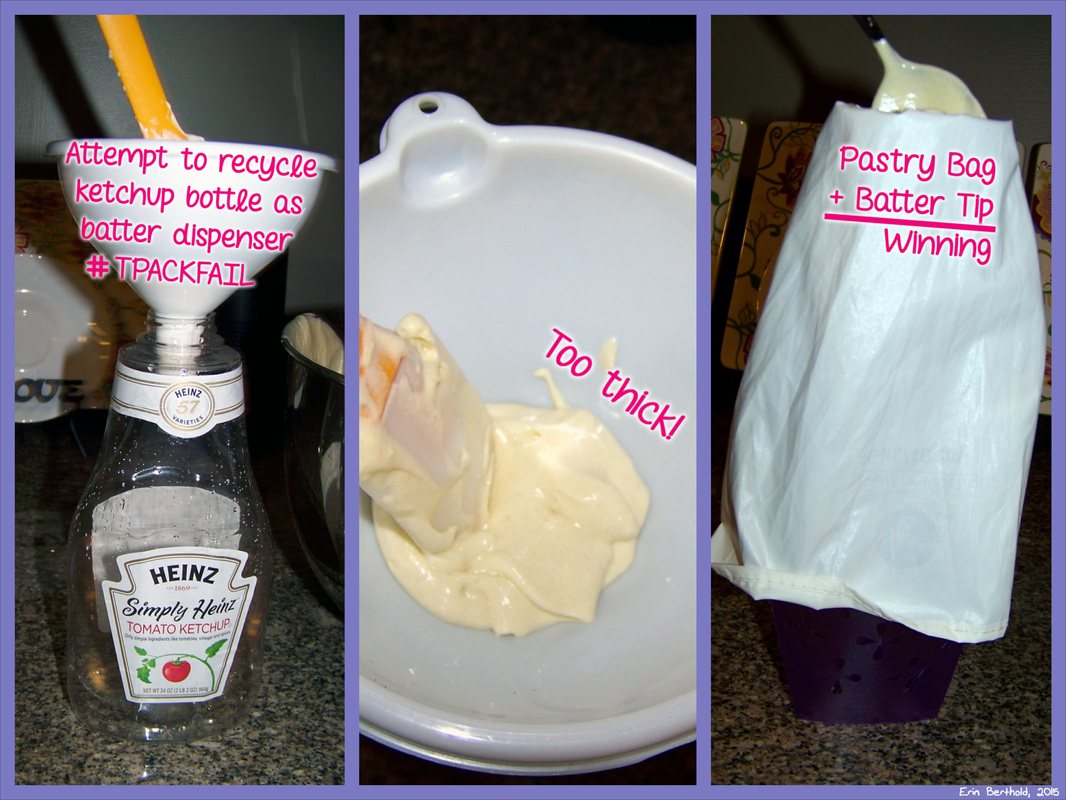
A lot of the sources I referenced said to use a Pancake Pen when filling the cavities of the cake pop maker. I didn't feel like spending $10 and waiting for it to arrive, so I improvised. I thought I could apply some TPACK and use a clean ketchup bottle instead. I never got to find out if it would work or not because the batter was too thick to fit through my funnel, and I knew just pouring the batter into the bottle opening would not end well. Luckily, I remembered that I had a batter tip for pastry bags. This was one of those I-thought-it-would-be-great-but-it-was-a-bust purchases. It was too hard to squeeze and took too long to fill a cupcake, let alone a dozen. However, it was just right for cake pops! P.S. If you don't get the reference in the title, go here.
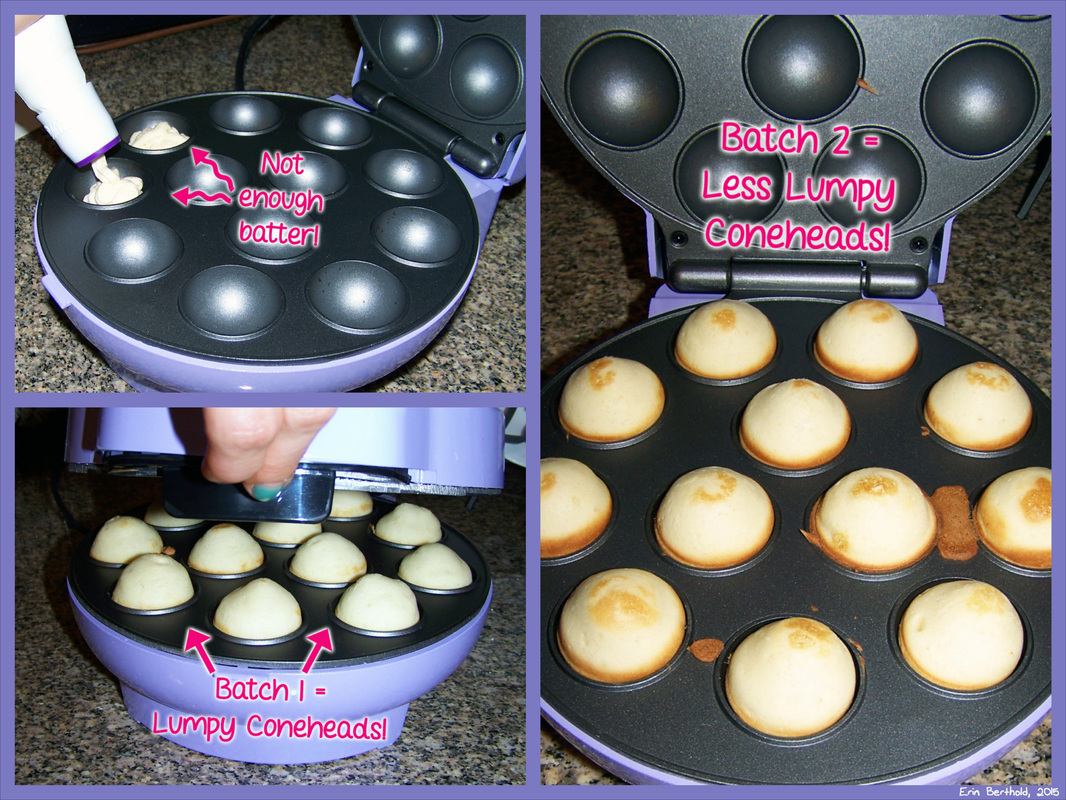
4. Lumpy Coneheads and Less Lumpy Coneheads
I needed another laugh after I finished filling the cake pop maker. Right after asking Alexa to set a timer for four and half minutes, I asked her to tell me a joke.
"What do you call an American Revolutionist who draws cartoons? A Yankee-Doodler."
You have to admit that one was pretty clever. When the time was up, I opened the lid to find lumpy conehead balls of cake. I thought maybe they just didn't bake long enough, so I baked the second batch for five minutes. Round two produced less lumpy coneheads, but coneheads nonetheless. I determined this must mean the cake pops needed more time and more batter.
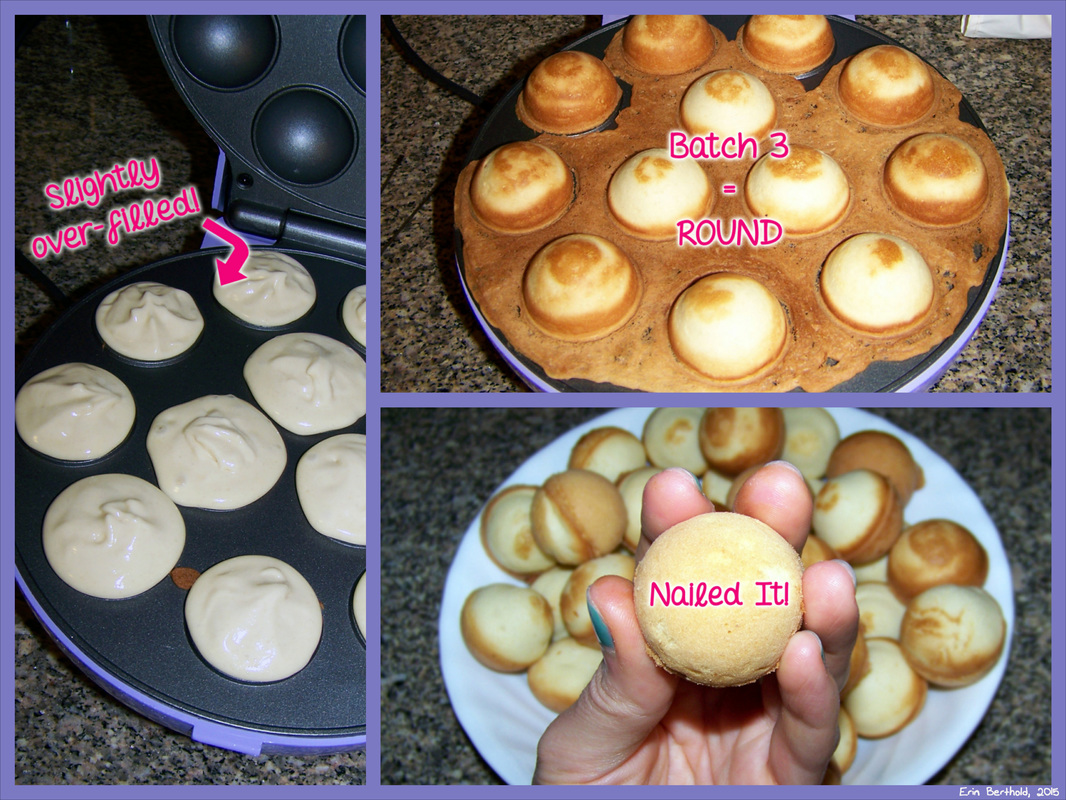
5. Third Times the Charm
I slightly over-filled each cavity in the third batch before asking Alexa to put five minutes on the clock. When I opened the lid they were all connected into what looked like a giant alien pancake. I thought, "Oh no! They are going to break when I try to pull them apart." Au contraire, those beautiful round balls of cake lifted right out! I did it, perfection! I was beaming! Unfortunately, I also nearly gave my husband a heart attack when I unexpectedly yelled, "They're ROUND!"
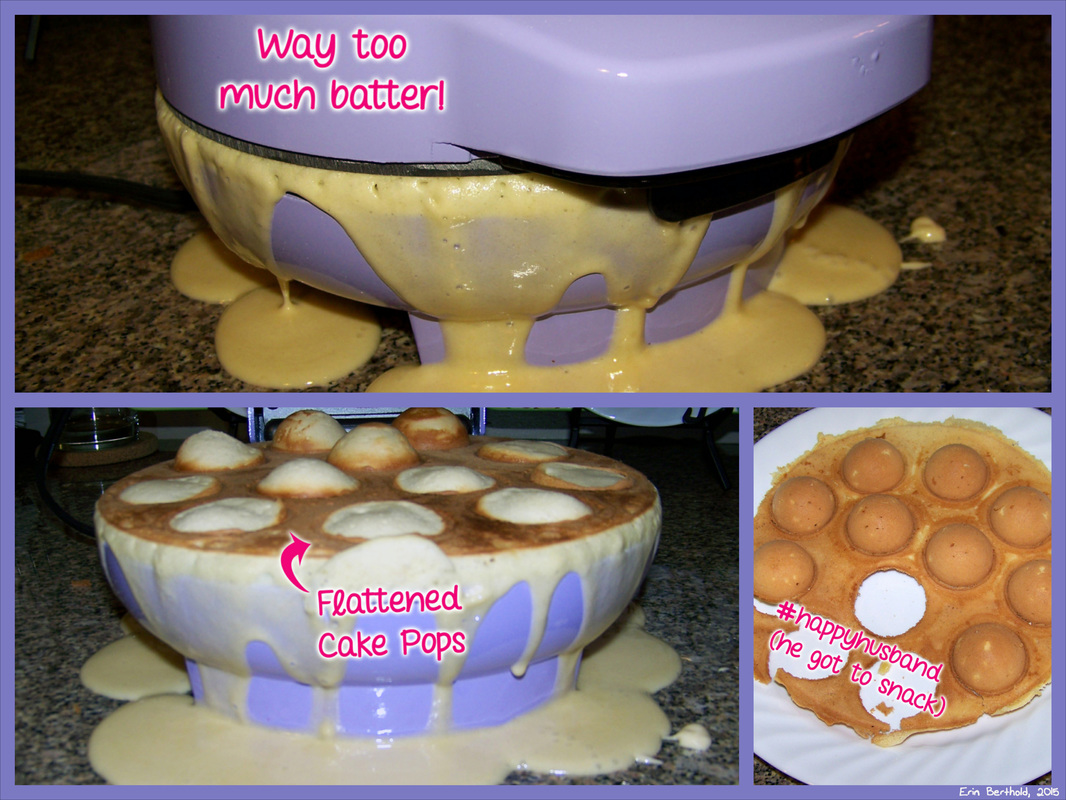
6. All That Glitters Is Not Gold
My cake pop maker redeemed itself. I even decided to make it a more prominent home in the baking cabinet, as I clearly got the hang of things and would surely be making cake pops all the time. My cake pop maker is a tease. Below is what happened during the fourth batch. Ok, I might have put a little more batter in than last time, but I swear it didn't seem like that much more. I guess there is also a chance I wasn't paying as much attention as I should have been. In my excitement over the third batch, I took to the internet to leave a comment on Love From the Oven's post about using the Babycake's cake pop maker. When I turned around from the screen and saw what is pictured below, my mouth dropped. All I could do was ask Alexa for another joke.
"What do you call a camel with no hump? Hump-Free."
*Sigh* Well, it was good while it lasted. Despite the last attempt, I consider this endeavor to be a success. My goal was to make round cake pops, which I did. I never said they all had to be round! I also met my own personal challenge and went outside of my comfort zone to comment on Love From the Oven's blog. More importantly, I am continuing to learn from my mistakes. Last time I learned the importance of using the right batter. This time I learned a valuable, and messy, lesson in filling the cake pop maker correctly.
Goals for Next Update:
For the next update I am going back to the goals I set last time: find a strategy to keep the cake pops on the sticks, figure out how to store them upright after decorating, and look into manageable decorating techniques.

 RSS Feed
